How to Create Drum Patterns in FL Studio: A Step-by-Step Tutorial
Drums are the heartbeat of modern music. Whether you’re producing hip-hop, EDM, trap, or pop, the drum pattern sets the groove and defines the energy of your track. Without a strong rhythm section, even the most melodic ideas can fall flat. That’s where FL Studio comes in. As one of the world’s most popular Digital Audio Workstations (DAWs), FL Studio makes it easy to design, arrange, and customize drum patterns that can elevate your music production.
For beginners, FL Studio’s step sequencer and Piano Roll offer a simple but powerful way to create rhythms. For advanced producers, its vast library of samples, VST instruments, and automation tools make it a playground for creativity. In this tutorial, we’ll break down the process of creating drum patterns in FL Studio step by step—from understanding the interface to adding finishing touches that make your drums sound professional.
By the end of this guide, you’ll know not only how to program drum patterns in FL Studio but also why certain techniques work, giving you the confidence to create your own unique grooves.
Why Drum Patterns Matter in Music Production?
Before we jump into the tutorial, let’s understand why drum patterns are so important:
- Foundation of Rhythm: Drums drive the tempo and groove of a song. A catchy drum loop can carry an entire track.
- Genre Definition: The difference between a trap beat, a house groove, and a boom-bap hip-hop track often comes down to the drum pattern.
- Energy & Emotion: Punchy kicks, snappy snares, and crisp hi-hats can instantly make a track feel aggressive, mellow, or energetic.
- Professional Quality: Well-structured drum patterns separate amateur beats from polished productions.
Now that we know why drums matter, let’s explore how to create them in FL Studio.
Step 1: Setting Up Your Drum Kit
Load the Step Sequencer
FL Studio’s Step Sequencer is the go-to tool for programming drums. Open a new project, and you’ll see channels like Kick, Clap, Hat, and Snare by default. Each channel is linked to a sound sample.
Choose Drum Sounds
- You can drag samples from FL Studio’s Browser into the channel rack.
- Alternatively, use built-in plugins like FPC (a drum machine) or Drumaxx for more control.
- For EDM, you might pick punchy kicks and open hi-hats. For hip-hop, you’ll lean toward 808 kicks and crisp snares.
Pro Tip: Always choose high-quality samples. Your entire mix depends on the quality of your drum sounds.
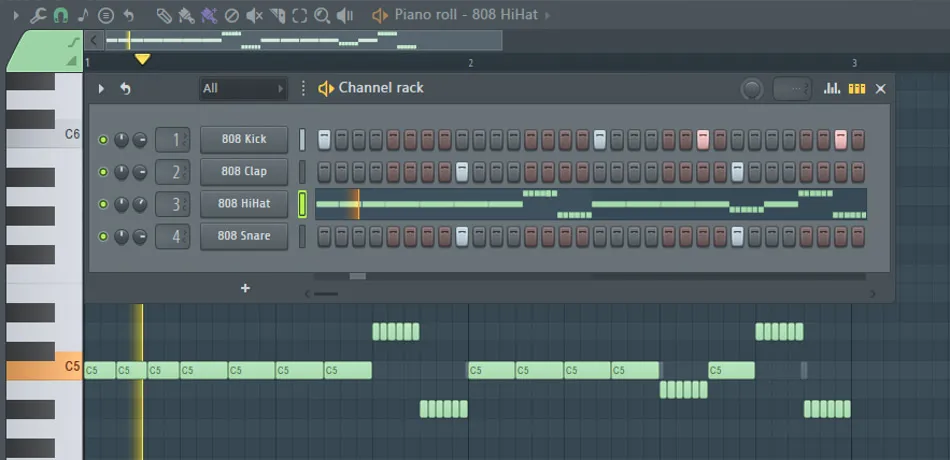
Step 2: Understanding the Step Sequencer
The Step Sequencer is divided into steps (16 steps per bar by default). Each square represents a note trigger.
- Kick Drum: Usually placed on beats 1 and 9 for a standard 4/4 groove.
- Snare/Clap: Often hits on beats 5 and 13 (the backbeat).
- Hi-Hats: Can be placed on every step (16th notes) or alternated for variation.
Example basic beat (16 steps):
- Kick on 1, 9
- Snare on 5, 13
- Hats on every 2nd step
This is the foundation of most pop and hip-hop rhythms.
Step 3: Using the Piano Roll for Complex Patterns
While the Step Sequencer is great for quick loops, the Piano Roll unlocks advanced creativity. Right-click a channel and select Piano Roll.
- Velocity Control: Adjust how hard each drum hits.
- Note Length: Extend hi-hats or toms for variation.
- Ghost Notes: Add softer hits for humanized grooves.
- Rolls and Triplets: Perfect for trap hi-hats or snare rolls.
Example: A trap hi-hat roll can be created by drawing rapid 32nd notes in the Piano Roll.
Step 4: Building Genre-Specific Drum Patterns
Hip-Hop / Trap
- Kicks: Punchy and often syncopated with 808s.
- Snares: On 2 and 4, with occasional ghost notes.
- Hi-Hats: Rolling 16ths or 32nds with stutters.
EDM / House
- Kick: Four-on-the-floor (every beat).
- Claps: On beats 2 and 4.
- Hi-Hats: Open hats on off-beats, closed hats on every 8th note.
Boom-Bap
- Kick: Swing-heavy, often varied.
- Snare: Tight and consistent on 2 and 4.
- Hi-Hats: Loose and humanized for a natural feel.
Step 5: Adding Groove with Swing
FL Studio has a swing slider in the Channel Rack. Adding swing shifts some notes slightly off-beat, creating a human-like groove.
- Perfect for lo-fi, boom-bap, and jazzy beats.
- Use it sparingly in EDM or trap for subtle variations.
Step 6: Layering and Sound Design
One of the secrets to professional-sounding drums is layering.
- Layer Kicks: Combine a punchy kick (for attack) with a sub-heavy kick (for low-end).
- Layer Snares: Stack a clap with a snare for more texture.
- Layer Percussion: Add shakers, bongos, or snaps for extra rhythm.
Use EQ to carve out space so layers don’t clash.
Step 7: Effects and Processing
Even great samples benefit from processing. In FL Studio, use the Mixer to add effects.
- EQ: Remove mud (100–300 Hz) and boost presence (2–5 kHz).
- Compression: Glue the drums together and balance dynamics.
- Reverb: Add depth to claps and snares (but use lightly).
- Saturation/Distortion: Add warmth or grit, especially for 808s.
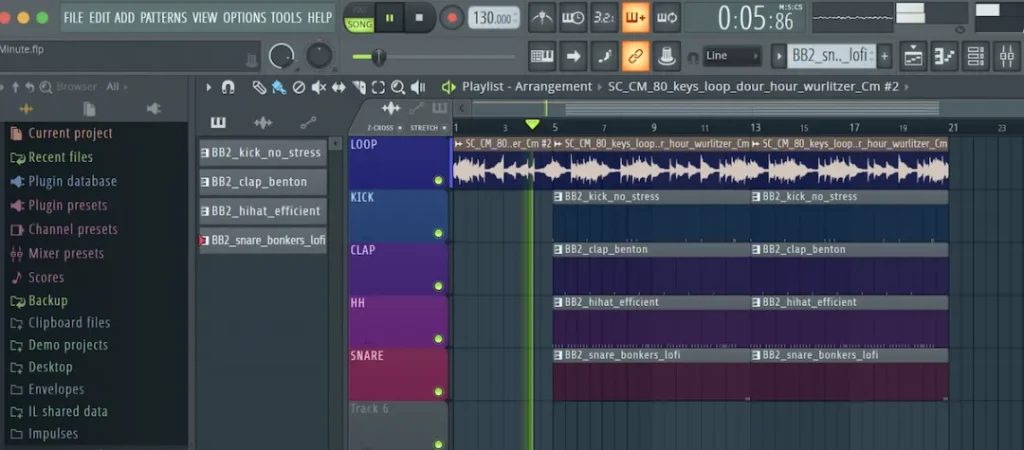
Step 8: Arrangement and Variation
A great drum loop is just the start. To build a full track:
- Intro: Simplify drums (kick + hat).
- Verse: Add snare and percussion.
- Chorus/Drop: Use full drum kit with added fills.
- Bridge: Strip back drums for contrast.
Variation Ideas:
- Add a crash cymbal when switching sections.
- Change hi-hat patterns every 8 bars.
- Drop out the kick before a chorus for tension.
Step 9: Humanizing Your Patterns
If your drums sound robotic, they won’t connect with listeners. FL Studio gives several tools:
- Velocity Variation: Make hits slightly louder or softer.
- Note Shift: Nudge some hits off the grid by a few milliseconds.
- Randomization Tool: Found in the Piano Roll, it helps create natural variation.
Step 10: Exporting and Using Your Drum Pattern
Once satisfied, you can:
- Export as MIDI: Reuse patterns in other projects.
- Bounce to Audio: Create loops to drag and drop.
- Save as a Pattern: Build a personal library of go-to grooves.
Advanced Tips for Professional Results
- Parallel Compression: Send drums to a separate bus, heavily compress it, and blend back in for punch.
- Sidechain Compression: Make space for kicks by sidechaining them to bass or pads.
- Layer Fills: Use toms, snares, or FX for transitions.
- Use Automation: Automate filter sweeps or reverb levels to keep drums dynamic.
- Reference Tracks: Compare your drums to professional mixes to check loudness and balance.
Conclusion
Creating drum patterns in FL Studio is both simple and endlessly creative. By starting with the Step Sequencer, moving into the Piano Roll for detail, layering sounds, and applying effects, you can design rhythms that fit any genre. Remember that drums are more than just beats—they carry the soul of your music. With practice, you’ll develop your own style and workflow, allowing you to create unique drum patterns that stand out.